
Setting Up Your New Wine Fridge: Easy Steps
415 Views
Read Time:3 Minute, 15 Second
You finally purchased that new built in wine fridges— great! And Now thinking How You Should Properly Store Your Wine. It’s super simple, so don’t worry. Whether you have a normal or a private wine collection, these easy steps will help you set up your wine fridge quickly.
Step 1: Choose the Right Spot
Both keep your wine safe, calm and stored flat, but one uses updated technology. After some time, it needs a recharge.
- Store away from direct sunlight: Light can deteriorate the quality of wine over time.
- No heat sources – not directly near ovens, stoves, radiators.
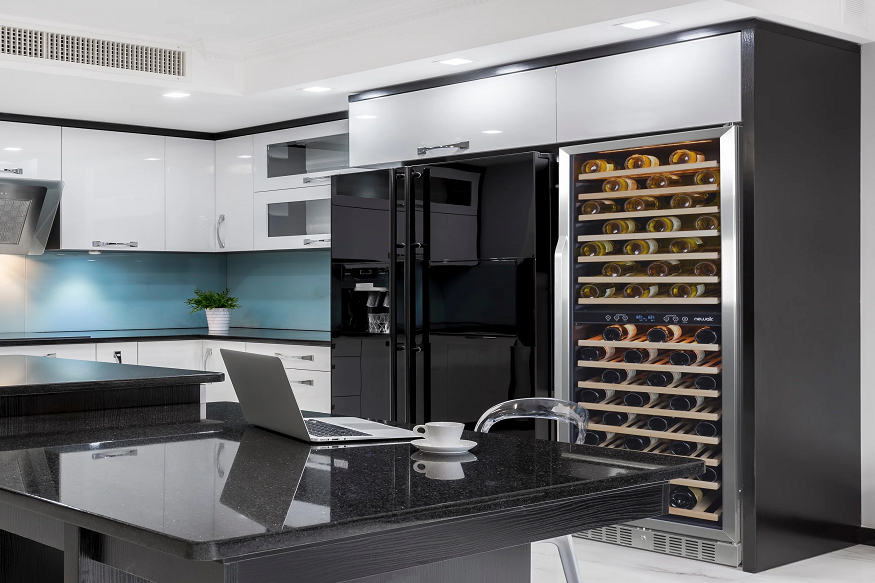
- Air circulation: Freestanding fridges should be left some space to breathe as they are designed to ‘discharge’ heat, unlike built-in models for slotting into cabinet units.
Step 2: Before Connecting – Wait
As a frier delivered and inclined on its way, it is in the running after driving to my sake, if some quiescence had already drained up Reichweite. ~ Uncle Brashy: If your fridge is delivered at an angle or moved outside of an upright position during transport, allow cooling fluid to settle. Leave it on for a minimum 4–6 hours (per the manufacturer’s directions) before turning it on.
Step 3: Clean the Interior
Take a damp cloth and mild soap to the inside, even though it is new. It makes sense, as this is to shake off any dust or smells from manufacturing and shipping. Check that it is dried out before plugging anything in again.
Step 4: Adjust the thermostat to a suitable temperature
Wines should be stored at a specific temperature, taking into consideration that different wines have different storage temperatures:
- For red wine – 55–65°F (13–18°C)
- Chilled White wine — 45–55°F (7–13°C)
- Sparkling wine – 40–50°F (4–10°C)
This would provide you with a better option of storing both types of wine, as in some dual-zone refrigerators, one zone can be 5 to 7 degrees cooler than the other.
Step 5: Organise Your Bottles
- Lay bottles on their sides when you store them, as this keeps the cork damp.
- Order Wines by Type (Red, White, Sparkling) to have in hand.
Step 6: Check Humidity Levels
If your refrigerator allows you to control humidity, 70% is a good mark. This is good for corks that do not dry and makes the wine fresh.
Step 7: Add Lighting to Your Garden (Where Needed)
LED lighting may be standard on some wine fridges. If you do not, consider adding a non-heat-generating soft light as well. Proper lighting lets you see easily and, more importantly, shows the bottles off well.
Step 8: Monitor and Maintain
- Do keep an eye on the temperature and ensure it is consistent.
- You can also wipe down the inside every few months to clean it.
- For any odd noises or temperature-related issues, refer to the user manual.
Step 9: Protect from Vibrations
Permanent vibrations can disturb the wine’s aging process by agitating the sediment inside the bottle. Keep your wine fridge on a stable surface, away from heavy appliances or areas with frequent foot traffic.
Step 10: Keep an Inventory
Maintain a simple log—either in a notebook or a wine app—of the bottles in your fridge, including purchase dates and ideal drinking windows. This ensures you enjoy your wines at their peak and prevents bottles from being forgotten at the back.
Final Thoughts
Installing your new wine fridge is straightforward if you follow these simple steps. Provided you store your wine correctly using the correct location, temperature, and organisation rules, it will be well-stored and ready to drink when you are.
Not only does a correctly laid out wine fridge save your bottles, but it also enhances your wine-drinking experience. Well then, relax—pour yourself a glass of wine and toast to keep your shiny new collection pristine.
Happy
0 %
Sad
0 %
Excited
0 %
Sleepy
0 %
Angry
0 %
Surprise
0 %


Average Rating