
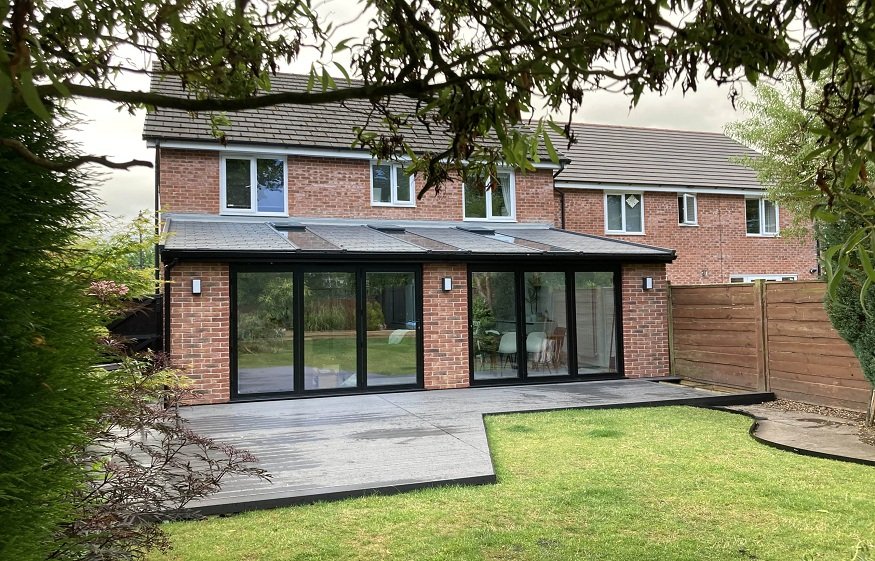
Many individuals who opt for a house extension reverse the order of operations. They first think about Pinterest boards and kitchen details when the initial steps, the ones that determine the success of the project take place in the first two weeks, even before touching a wall. Home improvement is for those who plan like a project manager while it can be detrimental for those who plan like an owner who is obsessed with a mood board.
This manual goes through the process in the correct order: conceptualize, survey, design, permit, construct, and finish. If you skip a step it won’t vanish – it’ll reappear later, be more costly and difficult to resolve.
Start With The Brief, Not The Floor Plan
Before you start talking to the relevant professionals, write down exactly what problem the extension is solving. Is the kitchen too small to cook and entertain at the same time? Is there no spare bedroom for a growing family? Does the house feel dark and closed off from the backyard?
This sounds obvious, but it’s the step most people rush. A vague brief like “we want more space” leads to scope creep, because every idea sounds reasonable when there’s no filter to test it against. A specific brief – “we need a fourth bedroom and a living area that opens onto the garden” – gives you something to measure every design decision and every dollar against. If a proposed feature doesn’t serve the brief, it’s a nice-to-have, not a need-to-have, and it should be priced and considered separately from the core project.
This is also the point to have an honest conversation about budget ceiling versus budget wish. Most extensions end up somewhere between the two, but starting with a clear brief means you know which parts of the wish list get cut first if costs run tight.
Check Zoning And Council Requirements Immediately
Obtaining planning permission is often the biggest source of project delays, and most of it can be pre-empted with some simple fact-checking at the outset. Setbacks, height limits, heritage overlays, and site coverage rules are different for every zone, and it can be surprising how certain constraints can shape the kind of house you can build. The subtleties of these regulations tend to be extremely low on the list of things people want to investigate after they’ve started spending time and money on architect’s plans.
With an average of 4-8 weeks for straight planning approval, significantly more where heritage or special variance is involved, it’s an unnecessary luxury to disguise the reality that you’re not 100% certain about what you can and can’t build while you are paying a designer to churn out plans that may all be for naught.
Get The Builder In Before The Drawings Are Final
Many homeowners treat the builder as the last contractor hired – the one who only comes on-site once council approval is in the bag and the architect has wrapped up. But it doesn’t have to be that way. Engaging a licensed builder during the design phase allows them to notice anything structurally that works conceptually but doesn’t in the real world, as well as to look at your dream plan and give an early reality check on whether it is achievable within your budget. Those discussions are far easier to have before all the drawings are finalised than after you’ve gone to tender only to have builders come back with quotes higher than you imagined.
This is where local knowledge comes in. A builder who is already experienced with sandy soil, coastal conditions, and all the little local government restrictions around bushfire compliance and setbacks specific to your area will just flat-out make fewer mistakes and spend less time running around in circles waiting on approvals than a national firm parachuted in from another city or state.
If you’re located in the area, pointing your browser towards home renovations caves beach will help you find a firm that doesn’t need lessons in sand drains or where to find the nearest fire safe refuge away from the dunes. They’ve already worked with them and made all the usual mistakes a decade or more ago in someone else’s home.
Finally, vet your builder in person. Get that quote, but also ask to see their license and their current insurance certs too. They should keep a running contract that shows each payment they receive is tied not to a date on the calendar but an actual inspection against an agreed list of work that should be done by that stage of construction. A reputable builder should also be more than happy to give your email or phone number to a couple of clients who are happy with the last big reno they did. A five minute phone call with someone they worked for a year or two ago will answer all the questions you have.
Commission AProper Site And Structural Survey
Soil conditions are used to determine your foundation method, and foundation method is what can add a zero to the end of the money you have to spend to make your lovely old house structurally sound. This is the stage people try to skip, because it’s money gone before you see walls starting to rise.
But guessing, or allowing your architect or draftsman to guess because they’ve spent years working on old houses in this area, can lead to a massive variation on the cost of your foundation partway through construction. A few hundred dollars now to get an engineer’s report on existing footings can save you tens of thousands of dollars later.
Beyond mapping your minefield, the survey tells the architect exactly what they’re working with. Original plans are often long gone, and what the previous owner added 15 years ago might be great – or might be what’s causing that ominous list to starboard. If you draw up new plans and 3D renders, then find out (as happened to me) that none of the original angles are still square because all the joists are coming away from the north wall, guess who has to pay the architect to redraw everything?
Design For Light And Flow Before You Design For Size
The most valuable and enjoyable extensions aren’t always the largest. Open-plan living – the kitchen, dining, and lounge in one functional space – is still in demand for a good reason. It makes a small square-metre tally feel expansive.
Read More: 7 Creative Tile Layouts To Make a Boring Wall Pop
Big opening windows, taller ceilings, and better indoor-outdoor connection have a greater effect on the feel of a space than additional square metres do. A well-lit fifty-square-metre room with a good connection to outside will be used more and add more to the value of the house than a dark, enclosed seventy-square-metre one.
This early on, you also need to know what your intentions are regarding energy. Insulation values, glazing specifications, and ceiling insulating levels need to be specified yesterday. Change any of those after your frame has gone up and the cost to get a crew back onsite makes for an expensive oversight. It would have been a cost-effective decision if it was made in time.
Budget It Properly, Not Optimistically
Find out the local cost-per-square-metre rate for the type of extension you’re thinking about and use that as a ballpark figure. Not a quote, a ballpark figure. Then add into that budget any plans you’ve seen or heard about that make you think “I haven’t seen anything that nasty”. A crisp new roof over most of the living area, say, or letting in light by squaring out the back of the house along with all those extra square metres; is there an old bathroom or kitchen that might look weird stuck out there at the end of the hallway with a new wall and a door in front of it? A few niggles you can’t really afford to ignore will surprise you how fast they add up.
If the extension is adjacent to a kitchen or bathroom, you might want to talk to a plumber and electrician early rather than later. Drainage runs and buried phone lines aren’t always exactly where the plans say they are either, and unexpected issues underground can add real cost once walls or floors are opened up. Budget for that possibility upfront rather than after the fact. Plan on at least fifteen to twenty percent contingency on top of everything else.
If the number that comes back after all of this still feels high, it’s worth comparing it honestly against the cost of moving. Stamp duty, legal fees, agent commissions, the moving truck, and the inevitable list of repairs a new house always needs add up fast. For a lot of homeowners, a well-planned extension turns out cheaper than moving once all of that is factored in – and it comes with the added benefit of not having to leave a neighbourhood or a school catchment they already like.
Know Which Upgrades Actually Pay You Back
Not every square metre you add is worth the same amount at resale. Bedrooms and widened living or dining areas tend to be solid value since the width of buyers they appeal to is really wide. Highly personalised additions – a wine cellar, a dedicated home cinema, an elaborate outdoor kitchen – rarely return their cost, because they only appeal to buyers who want that exact thing.
A useful benchmark: according to the National Association of Realtors’ 2022 Remodeling Impact Report, a primary suite addition typically recovers about 79% of its project cost in added property value at resale. That’s a strong return, though not a full one, and it’s a good frame for the whole budget conversation. The question isn’t “would this be nice to have” – it’s “does this pay for itself, and if not, am I okay paying the difference for something I actually want to live with.”
Plan The Build Sequence, Not Just The Finish
A typical extension runs somewhere between ten and sixteen weeks depending on scope, and that window covers demolition, foundations, frame, roof, services, and finishing, with inspection points at each stage. Knowing this sequence in advance lets you plan your own life around it rather than being surprised by it.
If you’re living on site during the build, plan for it properly. A temporary kitchenette, a separated laundry zone, and a proper dust barrier between construction areas and living spaces make the difference between a manageable few months and a miserable one. Ask your builder for a realistic stage-by-stage timeline up front, and get it written into the contract so there’s a shared reference point if things start slipping.
The households that come through an extension calmly are almost always the ones who knew what week the roof was going on and planned around it, rather than finding out the hard way that there’d be no hot water for three days.
Read More: How to Choose the Right Kitchen Countertop Material for a Busy Family Home
The Planning Window Is Where Projects Are WonOr Lost
Every budget overrun, council rejection, and problem we’ve outlined can be linked to something that was (or wasn’t) done in the first fortnight of planning. The construction phase is the most visible, least mysterious part of the building process, but by the time the framing goes in, the bulk of the die has been cast by the brief, the survey, the zoning research, and the contract you sign before it.
Give those first weeks the respect they’re due, and the construction phase will usually look after itself.